
One of the first things we did with the van, after dealing with some interior rust and installing our MaxxAir Fan, was insulate. We wanted to insulate the van so that it would stay warm in the winter but also keep out heat in the summer, since we plan on living in it year round. I did SOOO much research about all the different ways of insulating and all the different types of insulation. To be honest it’s been pretty overwelming trying to decide what was best for our build. If it was up to Will he woulda chose which ever type and technique he saw first. But I wanted to make sure we did things the best way we could for ourselfs and our van. And in the end I’m glad I took the time to research, even though the extent of it was probably a bit ridiculous. So hopefully this post will save you some time if you’re doing a van build too.

From the get go we knew we wanted to convert the van and be as environmentally friendly, as sustainable, and as chemical free as we could be. So I had already narrowed down the type of insulation we’d use to two options: 100% sheeps wool or insulation made from recycled plastic/plastic bottles.
Choosing between these two options we had a few key things we were looking for:
- We wanted our insulation to be able to handle moisture and control humidity
- I didn’t want any chemicals of any kind in the insulation. Call me a hippy but there is a lot of science that links health and fertility issues to chemicals used to bond insulation together. And since it’s such small, tight space, I just didn’t want any of that in the van.
- The insulation we chose needed to be 100% sustainable. Which meant that if the insulation we chose ever ended up in a land fill, it would decompose or be able to be recycled.
- It needed to be affordable
- We wanted to be able to work with the insulation without having to use any gloves or masks
With these things as decision makers, we quickly ruled out spray foam as there are a lot of fumes involved and is quite pricey. Not to mention, its permanent, so if we changed our minds about something later, it would be too late. And trust me, we change our minds a lot! We also ruled out any type of fiberglass insulation as we didn’t want to deal with having to wear full protective gear and have all the little particles that it lets off when its disturbed.
In the end we decided to go with 100% sheeps wool insulation. It was more expensive then the recycled plastic stuff but having doing a bunch a research we were happy to pay a little extra for its benefits and the comfort knowing that if it ever ended up in the landfill it wouldn’t be doing any harm and that we didn’t have to worry about any possibly harmful chemicals.
This post is in no way sponsored or influenced by any brands but I’m including the brand we chose so that it may save anyone else out there the time of having to find them themselves.
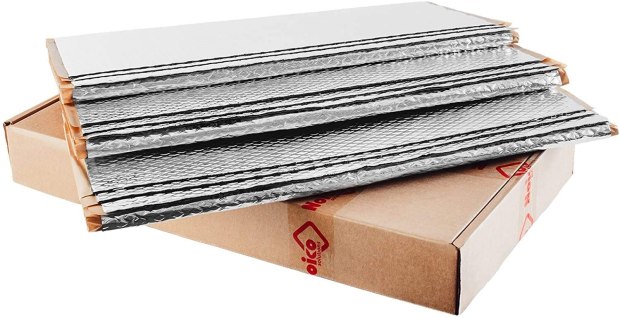
We are based in the UK and the only 100% sheeps wool insulation I could find was Sheepwool Insulation and they are based in Ireland but ship nationwide.
{ Photo not ours }

Our first actual step of insulating was to sound deaden. We put peices of Noico sound deadening sheets on the walls, doors, wheel arches and ceiling. Anywhere that could or might cause any noise or where peices of metal rattle. We also chose to fully cover the wheel arches in sound deadening sheets because it is a common place for rust to form and the sheets can act as an anti rust/moisture barrier. Most people put some on the floor as well but we actually forgot to do this step.
{ Photo not ours }
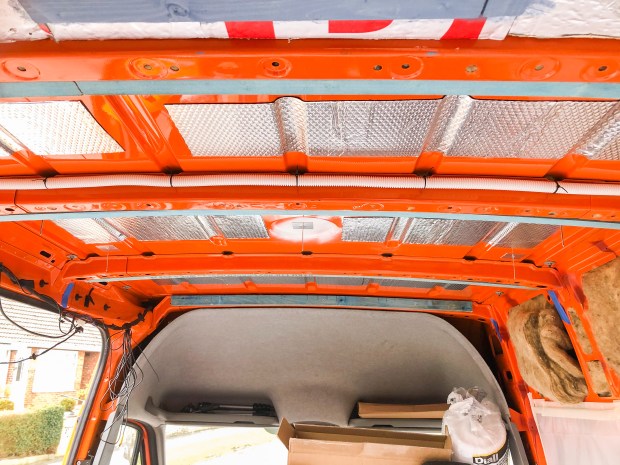
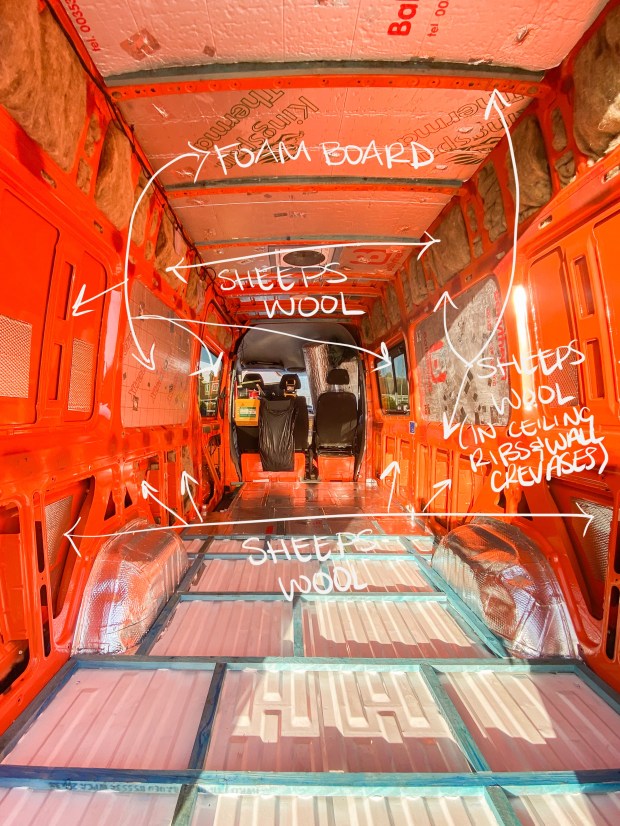
We filled all the ribs and crevases in the doors and the top and bottoms of the walls with the sheeps wool. For the ceiling, around the windows and the areas of the walls where there was nothing to hold the insulation in place we decided to use 25mm foam board insulation. We chose foam board for these areas because Will was able to bring some home from work that was destined for the skip, and we also found a way to hold the foam board in place without having to use spray adhesive.
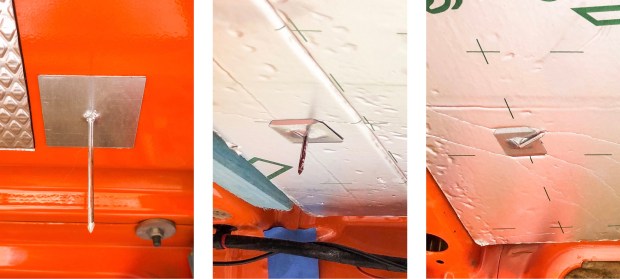
We used these insulation pins that you just stick to the the van and then push your peice of foamboard onto them. You then push a metal clip over the foam board and you’ve got your foam board fixed to the van. Its super easy. (**We got this idea from one of Greg Virgoe’s videos, it was not our own idea**). We ordered ours from ebay but i’m sure you can find them in other places as well.

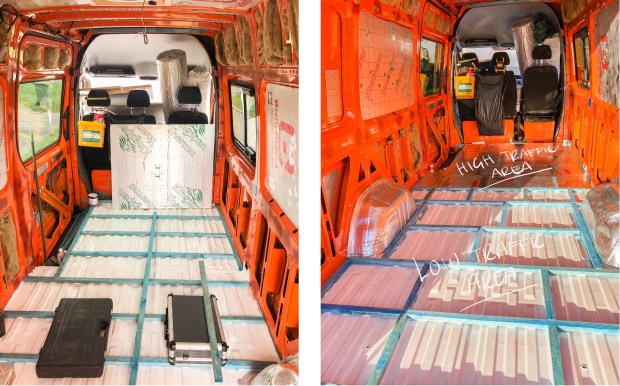
For the floor we decided to use the 25mm foam board insulation as well. We have seen so many different ways to insulate the floor and some people choose not to insulate at all. But we wanted the van to be fully insulated and properly prepared for most weather conditions and all kinds of adventures.
We again decided to follow Greg Virgoe’s way of insulating the floor ( video link here ). We framed out the floor into a sort of grid with pressure treated 25mm x 38mm (1″ x 1 1/2″) wood. We used 25mm x 38mm because when you lay it flat on top of the grooves in the floor, the 25mm foam board sits at the same height with not too much messing around. We found this pressure treated wood at Wickes and it is specially treated to be water resistant and anti-fungal which means that if there is any moisture around the wood at all it shouldn’t rot. And rotten wood is the last thing you want sealed in behind a vapour barrier under your floor in your van.
While framing the floor we added extra peices of wood in areas we knew would be heavy traffic areas, like by the sliding door, and the walkway through the van.
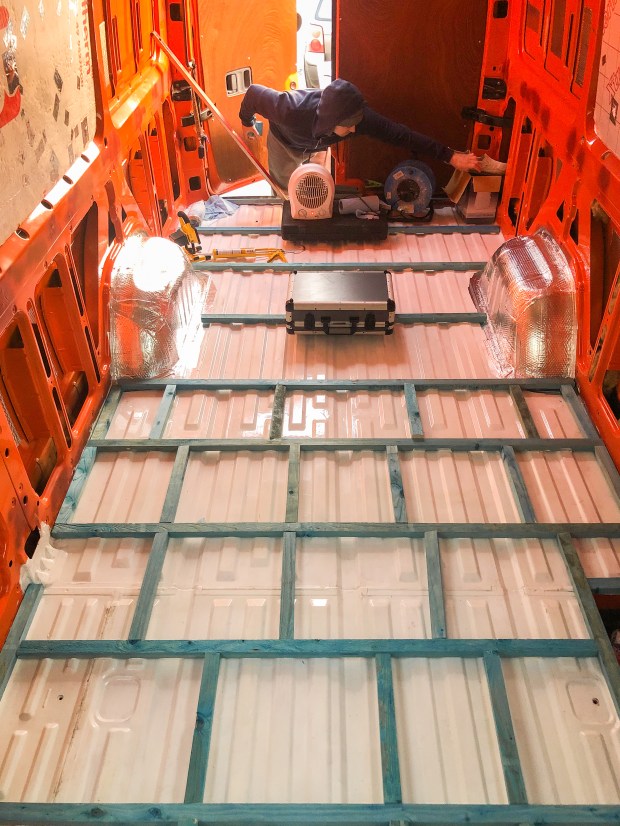
One thing we did differently is we used glue to attach the wood to the floor instead of screwing it down. We did this for two reasons. 1) We didn’t want to accidently screw into something underneath the van. And 2) We didn’t want the screws to be sticking out the bottom of the van. In our minds having the metal screws sticking out the bottom of the van were they will get muddy and wet is just asking for rust and then the rust could form on the floor and then you’ve got a problem. So we just used Multistik all purpose adhesive/glue and it worked fine. If you use a different glue just make sure its safe to use on your painted van floor and make sure it does NOT set solid/hard, otherwise the vibrations of the van moving will eventually break its hold. It was a bit finiky and took longer because it was cold and we had to allow time for the glue to dry but it worked really well. Nothing came unstuck when we wedged the insulation in. And we reallllly wedged it in there.
Once the glue was all dry and had time to fully cure, we then filled these square/rectgangle areas with foam board. The whole process took time but was relatively straight forward. We then sealed it all with foil tape to create a solid moisture barrier.
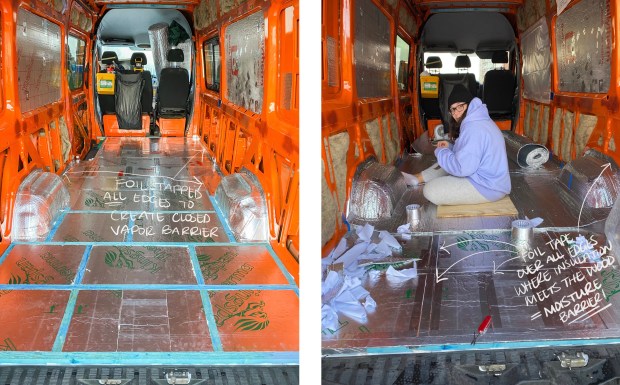
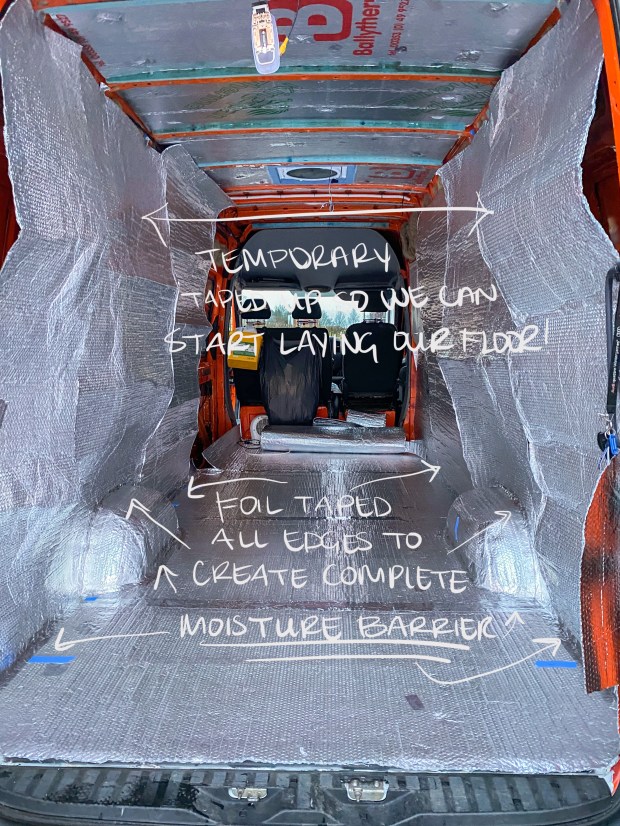
With all the insulating done we then laid our reflectix (bubble foil insulation). We layed reflectix on the floor (although most don’t do this but we had enough and figured it couldn’t hurt), once again taping all the edges to create a closed moisture barrier. We also started running reflectix on the walls but only taped the bottom of the reflectix to the floor because we are still waiting for our bunk windows to arrive and be installed. But, with the reflectix taped and sealed to the floor we can now start laying our floor. Finally!
We hope that some of this info and the links we shared will help any of you building or looking in to building your own van 🙂

- Sheeps Wool Insulation – 3 rolls for the top and bottom of the walls, doors, ribs, crevases and behind the headliner. We chose to go with their Optimal rolls because of where we planned on putting it.
- 25mm Foam board insulation – (Atleast 3 full sheets and maybe a bit extra depending on how efficient you are.) Middle of the walls (where windows would/could go), ceiling, back doors where windows could go and floor. We used several differet brands because we were given some for free and we also bought some ourselves. This link is for B&Q but you can buy it from a lot of different places. As long as it’s foil covered it’s fine.
- Insulaltion stick pins – Used with foam board on the walls, back doors, and ceiling
- Reflective Bubble Insulation – 2 full rolls total used on the floor, walls, and ceiling. and we had to buy a 3rd but have only used a small amount of it.
- 75mm Foil tape – 3+ rolls, but we used taped absolutely everything.
- 25mm x 38mm Pressure treated wood for framing – 2 packs of 8 battons was enough, with a little left over. Used on the floor and other places. Treated to be water resistant and anti fungal.
- MultiStik General All Purpose adhesive – Roughly three tubes used on the floor
- Self tapping screws – Used these to attach peices of pressure treated wood to the ribs on the ceiling of the van.
- 54 sq ft Noico sound deadening sheets – We ordered two seperate boxes and ended up with 1 part piece left over.
